
Computer-assisted translation tools are an immense help for the busy translator because they allow you work faster and cope with tight deadlines more efficiently.
However, just like any computer program, CAT tools are updated on a regular basis, which means you often end up spending more time trying to work out how to use the features of a tool than actually translating, which can become time-consuming.
But don’t worry, because the Acolad Community has put together these great tips to make your job easier. 😊 In part one of our guide, Acolad’s translation project managers share their expertise on how to master Quality Assurance (QA) tools. In this first article we will be focusing on the Trados Studio QA checker.
What is a Quality Assurance (QA) Tool?
The Quality Assurance tool is a plug-in that scans a project and checks certain elements of the text based on pre-configured profiles (generic or client-specific profiles). The QA tool simplifies this process and automatically generated a predefined check list for the bilingual file (translated file or translation memory export), this includes*:
- Repeated words;
- Segments not translated ;
- The target segment does not contain the correct term for “[term]” (= coherence with TB);
- The translation of the segment is not coherent with segment [number].
*These are just a few examples, not a complete list. Thanks to the QA Tool, you can now focus all of your attention on the linguistic aspects of the job that cannot be checked by a machine: e.g. wording, meaning, cultural references, etc. Most CAT tools have their own integrated QA tool. Independent tools such as QA Distiller and XBench can also be used in standalone mode.
Take a look at our e-book dedicated to CAT Tools to get more tips about the QA Checker. You will also learn about the differences between SDL, Memsource and MemoQ and how to manage terminology.
Quality Assurance Vs. Proofreading
QA and proofreading help ensure a high quality translation project. However, they are two distinct processes. Quality assurance is done at the end of a translation with a QA checker before the proofreading process, which compares the source text with the target text for spelling mistakes, grammar, typos, etc.

How Does the SDL QA Checker Work?
You launch the QA tool on a file or a group of files according to the parameters defined by yourself or the project manager. After this, you will then see a result log containing a list of potential errors that can then be exported or corrected directly. Here are the detailed steps for running the SDL QA Checker:
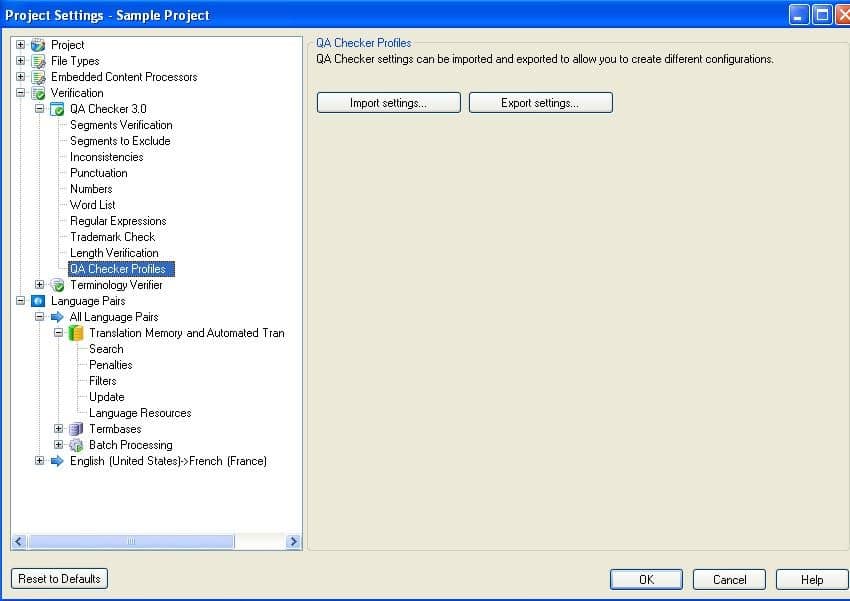
Importing a QA Checker Profile
QA Checker profiles are either contained in a package or sent to you separately by your project manager. To import a profile:
- Click on Verification in the left pane of the Project Settings window;
- Click on QA Checker Profiles;
- Then click on Import settings and select the format of the file in which it was saved.
You must make sure you do this because Studio does not save profiles used for other projects. This means you will have to apply this first step again for each new translation project.
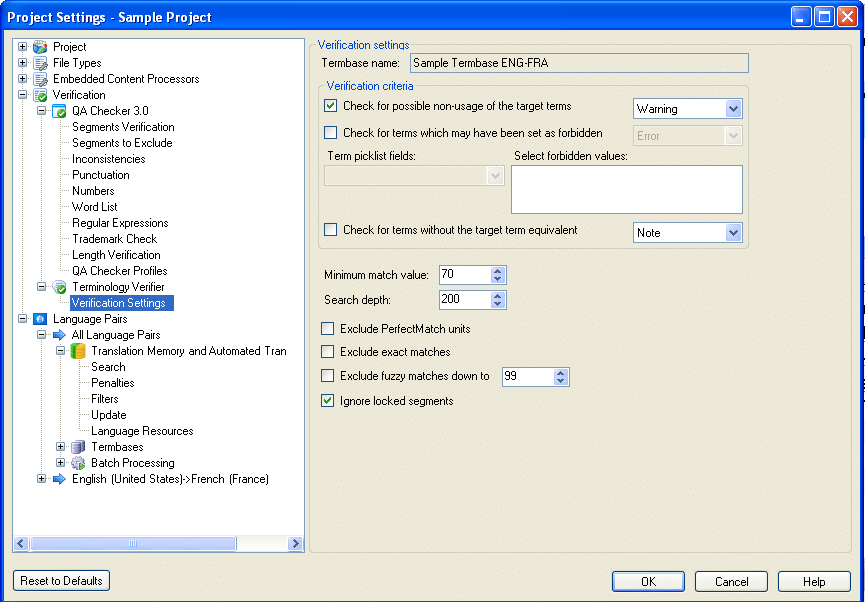
Configuring the Terminology Verifier Plug-In
- Go to Project Settings and click on Verification in the left pane of the window;
- Now click on Terminology Verifier > Verification Settings;
- Tick the Check for possible non-usage of the target terms
Launching the QA Checker and the Terminology Verifier Plug-In
1. First of all, check that the QA Checker, Tag Verification and Terminology Verifier boxes have been ticked in Verification.

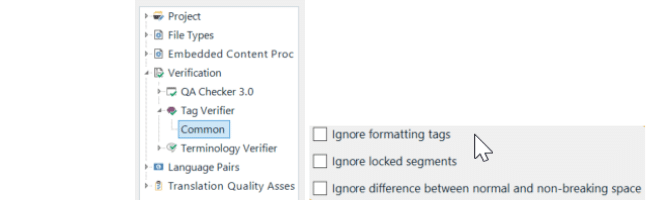
2. Then, go to Tag Verifier> Common, and, unless instructed otherwise by your project manager, make sure that these three boxes are left unticked:
- Ignore formatting tags
- Ignore locked segments
- Ignore difference between normal and non-breaking space
3. Then, in Editor view, press F8 or click on Verify.
4. Errors, warnings and notes will be displayed as in the example below:
5. Double-click on a row and the following window will appear (click on the link below to see the illustration).
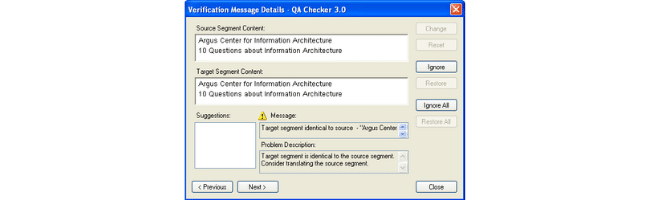
6. Apply any changes you wish to make directly in the window and click on Change. If no corrections are required, click on Ignore.
7. Check all of the verification rows until all of the notifications have been dealt with.

A Quick Tip for Running the QA Checker on Multiple Files
If you are used to working on multiple files at the same time, you can run the QA Checker all in one go. To do this, select all of the files in the Files window and then click on Open for Translation (or Open for Review) by right-clicking on the selected files.
Checking Consistency with the TermBase (TB)
TermBase (or Multiterm) is a bilingual glossary attached to a Studio project as a plug-in. You can easily spot this because it is marked by a green book icon.
During a translation, you can display the icon by clicking on View > Term Recognition.
The QA checker will alert you when a term has not been translated correctly. To set up these alerts, click on Project settings > Terminology Verifier > Verification Settings. Then make sure you have ticked the following boxes:
- Check for possible non-usage of the target terms
- Check for terms which may have been set as forbidden
- Check for terms without the target equivalent
Launching Spellchecker at the End of a QA Check
In the Editor section, click on Check Spelling (next to Verify) in the Review tab or press F7.
Now the QA Checker in SDL has no secrets for you anymore! There are obviously more features to explore that we will introduce to you very soon.
If you have any other questions or tips to share about QA Checkers or SDL, feel free to share them in the discussion group!
If you haven’t already done so, follow us on our Facebook and LinkedIn pages to keep up with the latest news from Acolad Community!