It can never be said enough that computer-assisted translation tools allow you to work more efficiently. You all probably know SDL Trados, but nowadays, you have a wider range of other CAT tools. As new technologies keep on improving, you can now work online thanks to cloud-based CAT tools, including Memsource.
Whether you want to test another CAT tool or expand your set of skills and software, Acolad Community has put together tips to start using Memsource. Here, Acolad’s translation project managers share their expertise on how to master Memsource’s basic features:
What is Memsource?
Memsource is an online translation tool and project management system. It has many functionalities in common with other CAT Tools like SDL and MemoQ, for example the creation, importation and management of translation memories and termbases, and machine translation.
You can have a look at our e-book about translation tools, which will help you make the most of these tools and check what you can do or cannot do with SDL, Memsource and MemoQ.
Memsource is divided into three environments:
- Memsource Cloud, the main interface in which you can create and manage projects
- Memsource Web Editor, the online working platform, with an interface similar to other CAT Tools
- Memsource Editor, the offline working platform
How to accept a project in Memsource
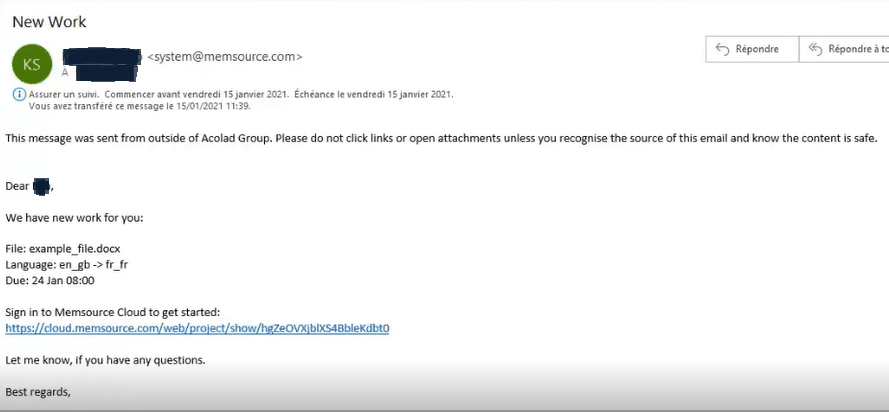
When you receive translation projects, everything starts with an automatic message that lets you know that you have been assigned a translation project in Memsource.
It contains the name of the Project Manager sending the Memsource project, so you know who you can be in contact with, and the name and languages, as well as the deadline, the username and the project URL needed to accept the project.
You can also find extra links at the end of email, which are Memsource’s guidelines and help.
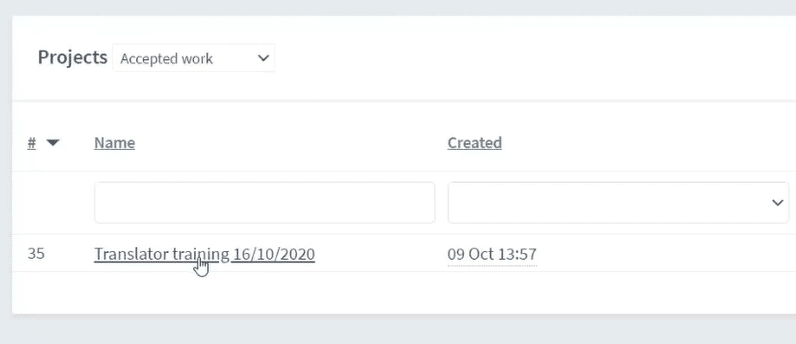
Please note that projects are classified in three categories in the Projects pane, based on the progress status:
- Accepted work: the project has been assigned to you, you have taken it on, but you have not finished it yet
- Completed work: you have been assigned the project and you have finished it
- New work: the translation project has been assigned to you, but you have not taken it on yet
After you have accepted the project, you have to tick the checkbox corresponding to the file you want to work on. In case of multiple files, tick individually what you need to work on (click on the Top check box to select all files).
Click on change status to open the document, otherwise there will be a red warning saying “You have not selected the job to open it. You can only open it and read only”.
If you haven’t changed the status to accept the work, it would again come up with a red banner across the top saying: “Warning! You need to accept this job to be able to actually edit it.” Otherwise, you can open and do modifications, but they wouldn’t be saved at all, or you’d lose everything that you have edited.
You have three options when changing the status of the file:
- Accepted by provider
- Declined by provider
- Completed by provider
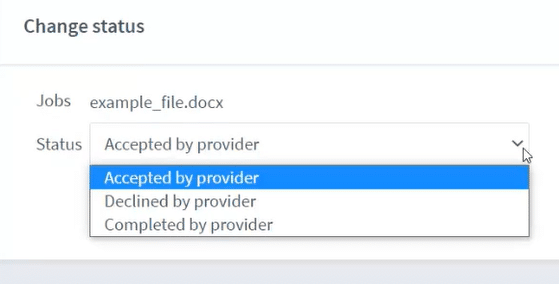
Warning: after clicking on “Completed”, you won’t be able to open the file. If you click on “Completed by provider” by accident, just contact the Project Manager to reopen the project.
Memsource’s basic features in the web editor
Here, you will discover how the interface looks like, how to create and search the translation memory and the termbase, how to run a QA checker, and how to deliver the translation job at the end.
Memsource Web Editor interface
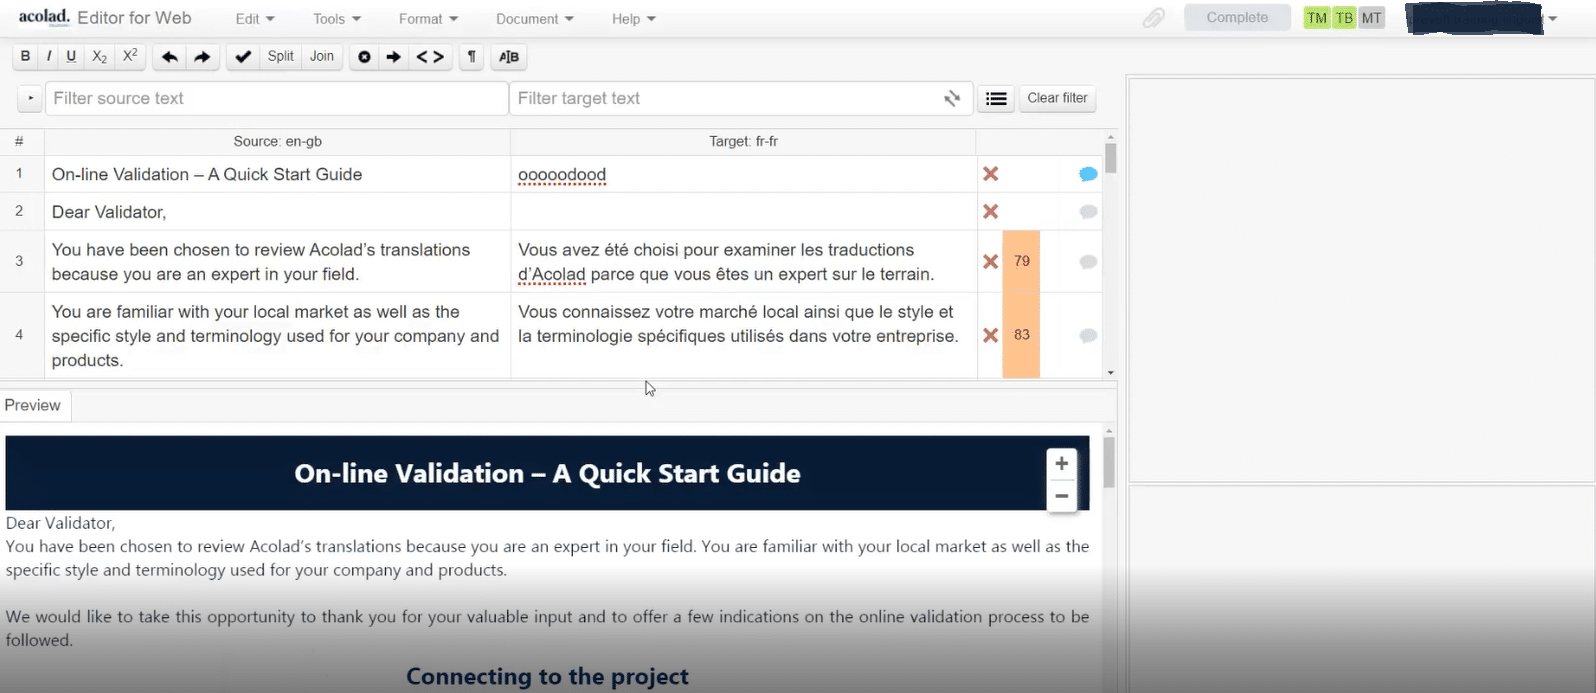
As you can see, the Memsource interface is the same as that of other computer-assisted translation tools. You have the possibility of setting up a preview window below to see the lay-out of the document. This is useful if you need to see the source file when translating or check the final lay-out of the target file.
Filter parameters in Memsource
They are the same as other translation tools. However, you have extra options for setting up filters by segment status (Empty, 1st repetition, confirmed, edited, etc.), segments created/Modified, comments created/Modified.

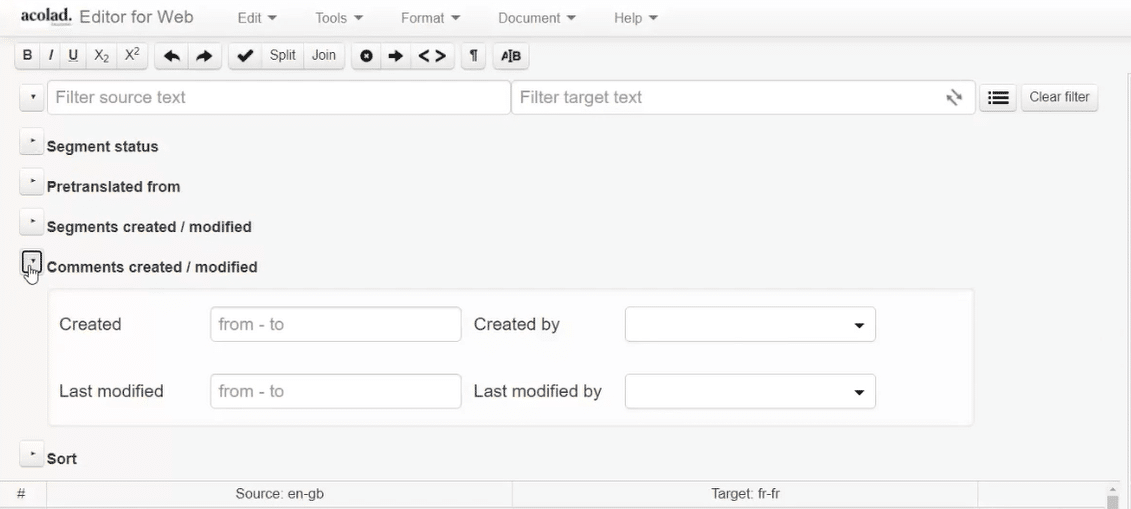
Don’t forget to clear the filter when you’ve finished, otherwise you won’t be able to see the rest of the document.
Segment status in Memsource
You can see the segment status system at the right side of the target text pane. When you see a red cross in the pane at the right of the target text segment, it means that the segment is unconfirmed. It is also considered as a “draft” status. To confirm this segment, just press Ctrl + enter or click on the cross to change the segment status.
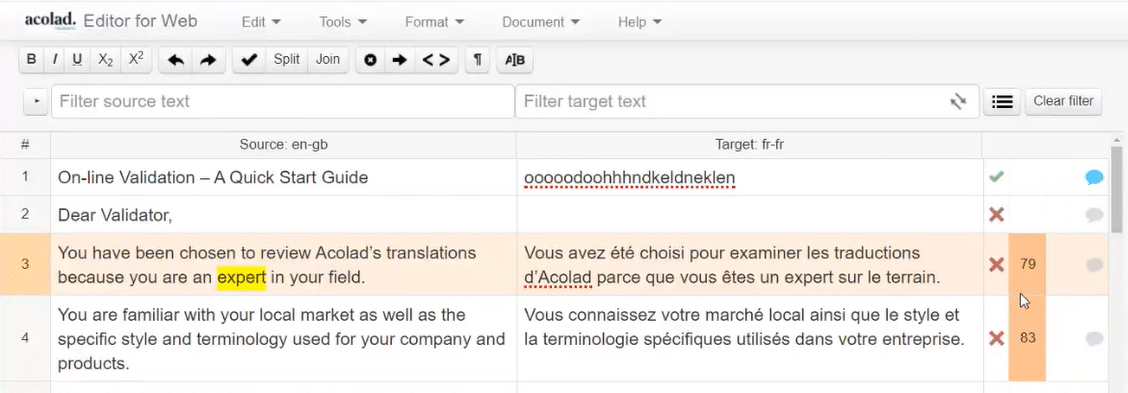
At the bottom of the screen, you can find the number of segments, words and characters that the document contains. It is displayed as the number of segments or words/Number of segments or words that have been confirmed/Validated. This number is updated when a segment is validated/confirmed.
Searching resources in Memsource like translation memories and termbases
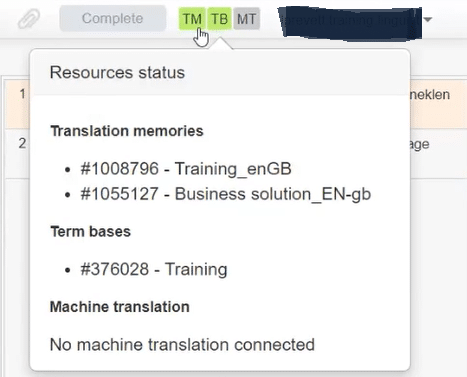
In Memsource, you can also see all resources currently used for your project at the upper side of the right pane. When they are highlighted in green, it means that they are active and available to use. If it’s greyed out, it means that they are not available.
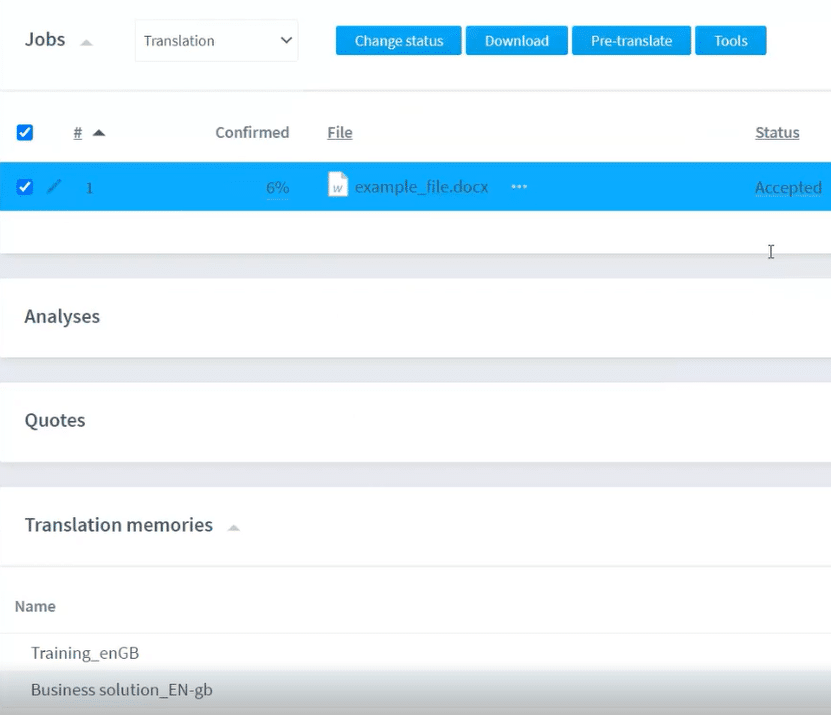
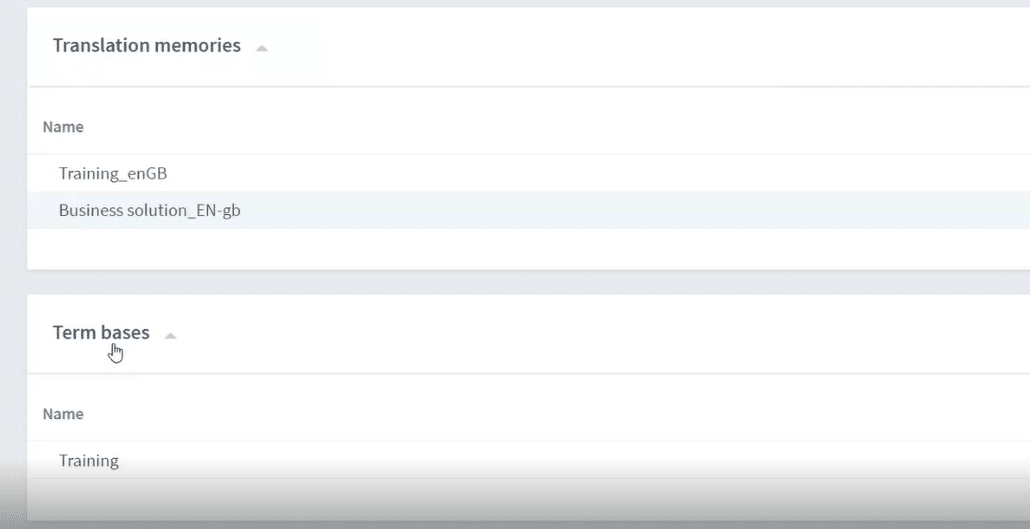
Another way of looking for another resource related to a particular project is on the main dashboard page for the project. When you scroll down, you can see which translation memory and termbases have been attached, and if there are reference documents too.
Importing a translation memory in Memsource
If you want to reuse a translation memory (TM) that has already been created on Memsource, go to Translation Memories in the dashboard and click on Select.
If you want to reuse a TM provided by the client, click on Create New.
Complete all information fields (name, source language, target language, domain, etc.). Then click on Create. On the next page you can edit the name of your file.
You can import another TM, for example the one provided by the client, export this TM or align files.
In the Editor view, on the right pane, you can see the name of the TM name, date of creation (you can also see who created the TM, most of the time it’s the client) and date of modification.
Import a termbase in Memsource
If you want to reuse a termbase (TB) that has already been created in Memsource, click on Select in the dashboard.
If you want to use a TB the client provided, you need to create a new TB and import the client’s termbase into the recently created TB.
On the next page you can edit the name of your file, enter terms manually or import another TB (for example, the one provided by the client)
As for a TM, you can import another TB, export this TB or align files.
Run the QA Checker in Memsource
The QA Checker is automatically set to check certain “errors”, such as missing or additional spaces, spelling, number errors, inconsistent translations, etc.) but there are some QA errors that are called “blocking errors” which is a safety feature. This means that you cannot validate and deliver your translation until you’ve handled certain QA errors (e.g. empty target or missing translation).
Once you have finished setting up the QA checker, click on run job QA.
Generate documents and deliver the job at the end
Once you have finished the translation, go back to project dashboard and change status to “Completed by provider”.
Note: If the project you’ve completed is the only one assigned to you in Memsource, you will get a system message saying that your account will be temporarily de-activated because you have no more jobs waiting in Memsource. That doesn’t mean you’ll never be able to access Memsource again (!), it just means that, for security purposes, the system temporarily stops you from accessing Memsource.
Next time you are assigned a job, you will automatically have access to Memsource (with the same login and password information).
Now you know how to use the essential Memsource basic features! In another article to come soon, we will go further in our exploration of Memsource advanced options and features.
If you have any other questions or tips on Memsource, feel free to share them in the discussion group!
